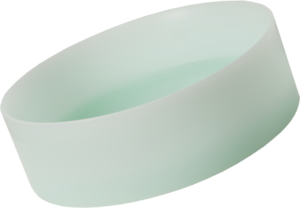
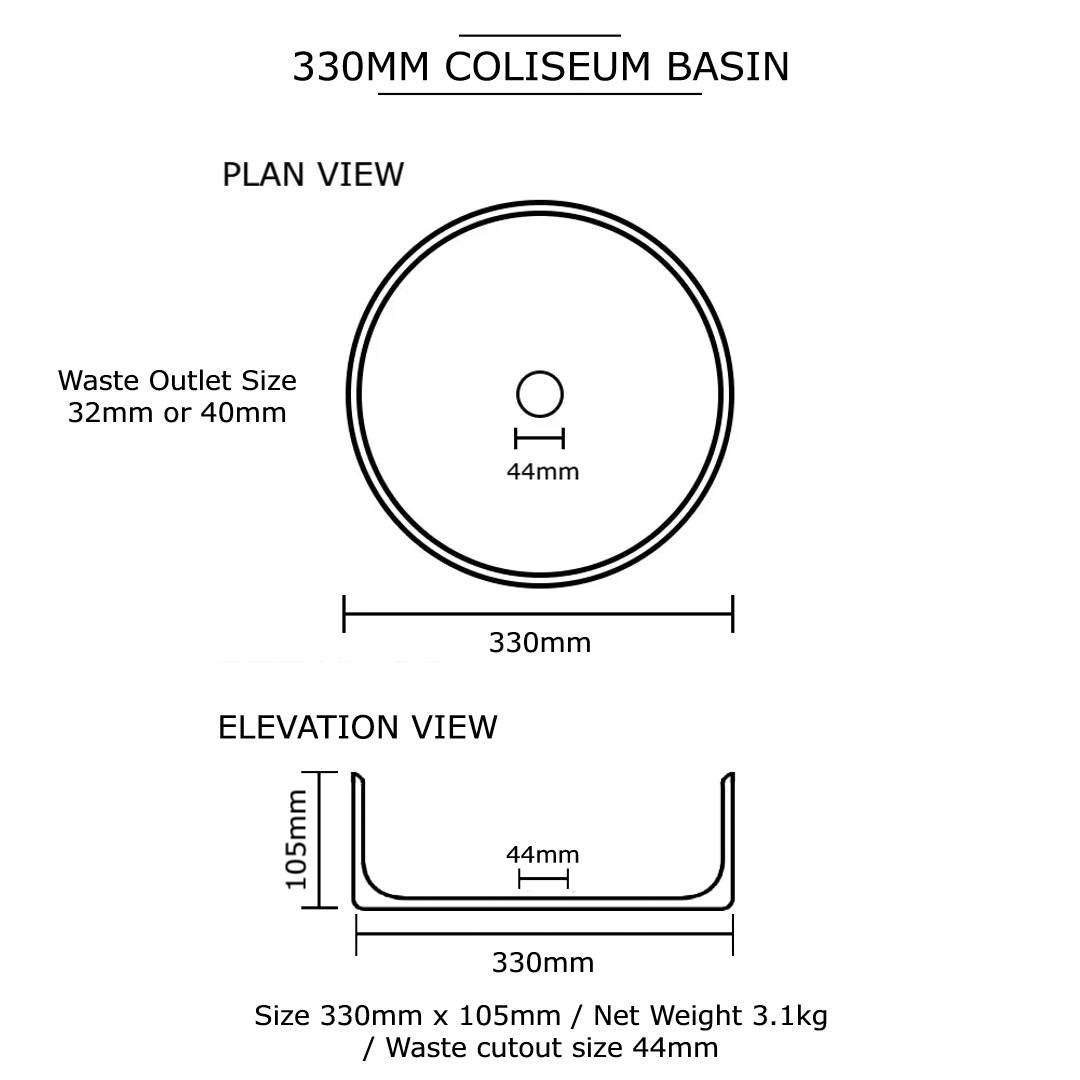
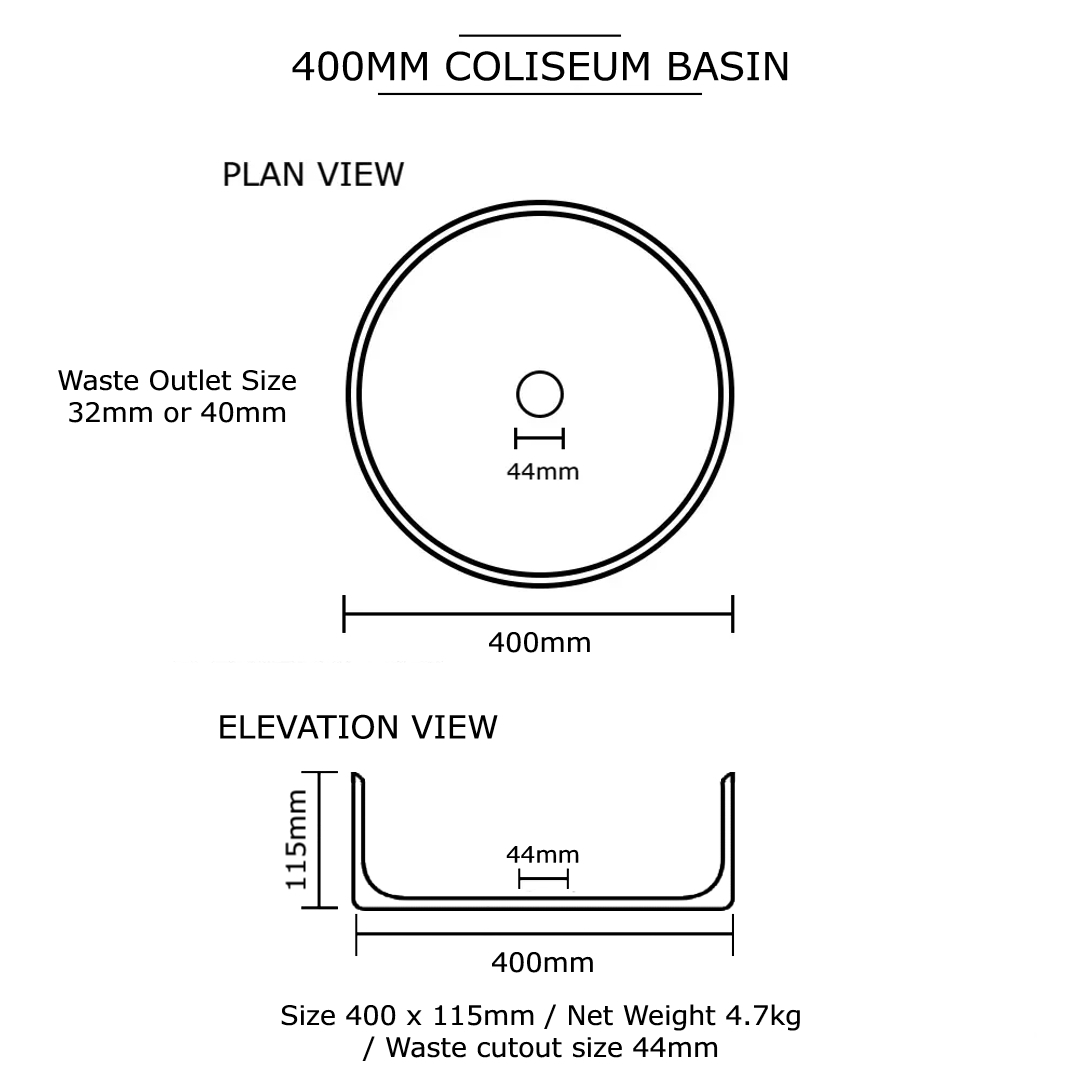
Coliseum Shapes


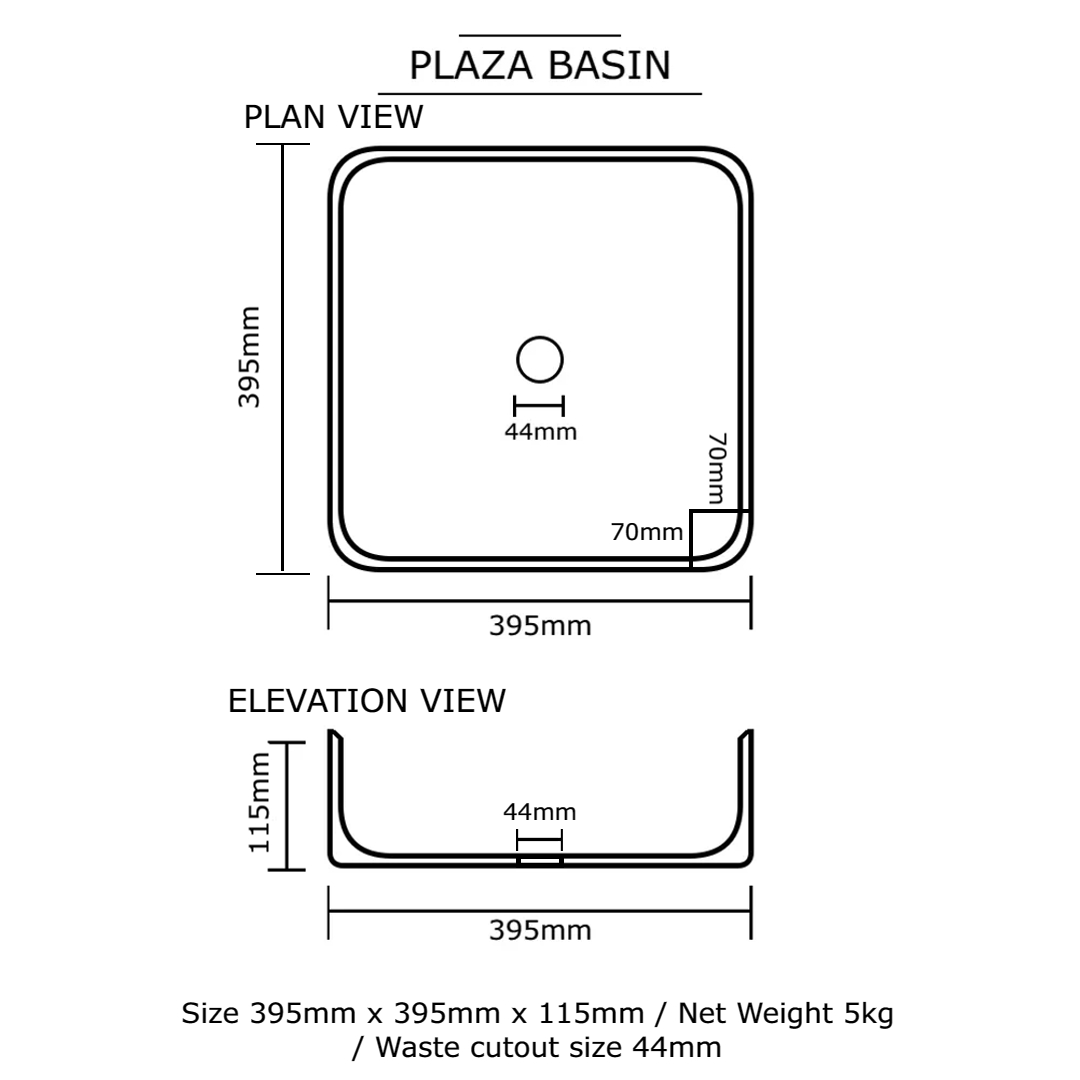
Plaza Shape

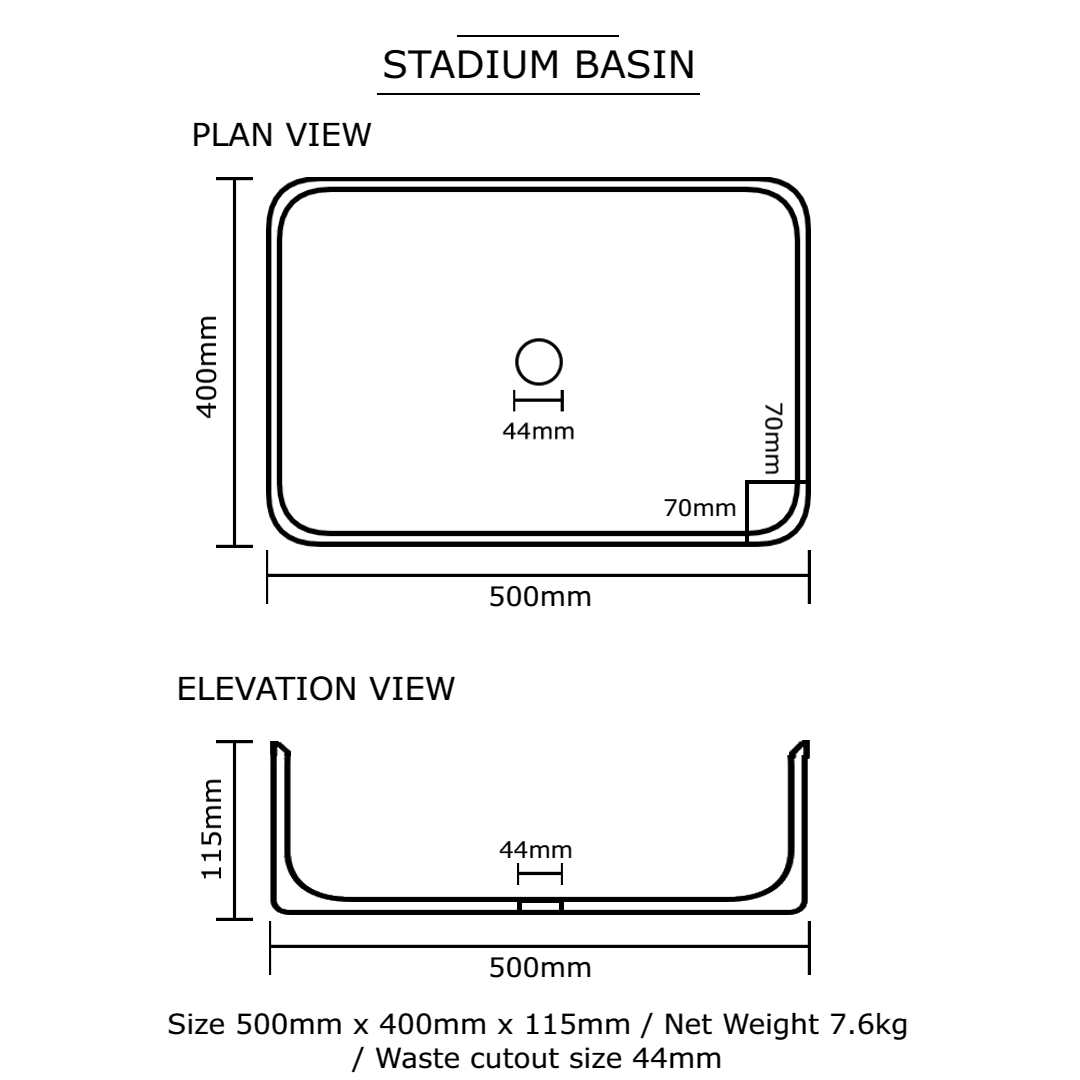
Stadium Shape

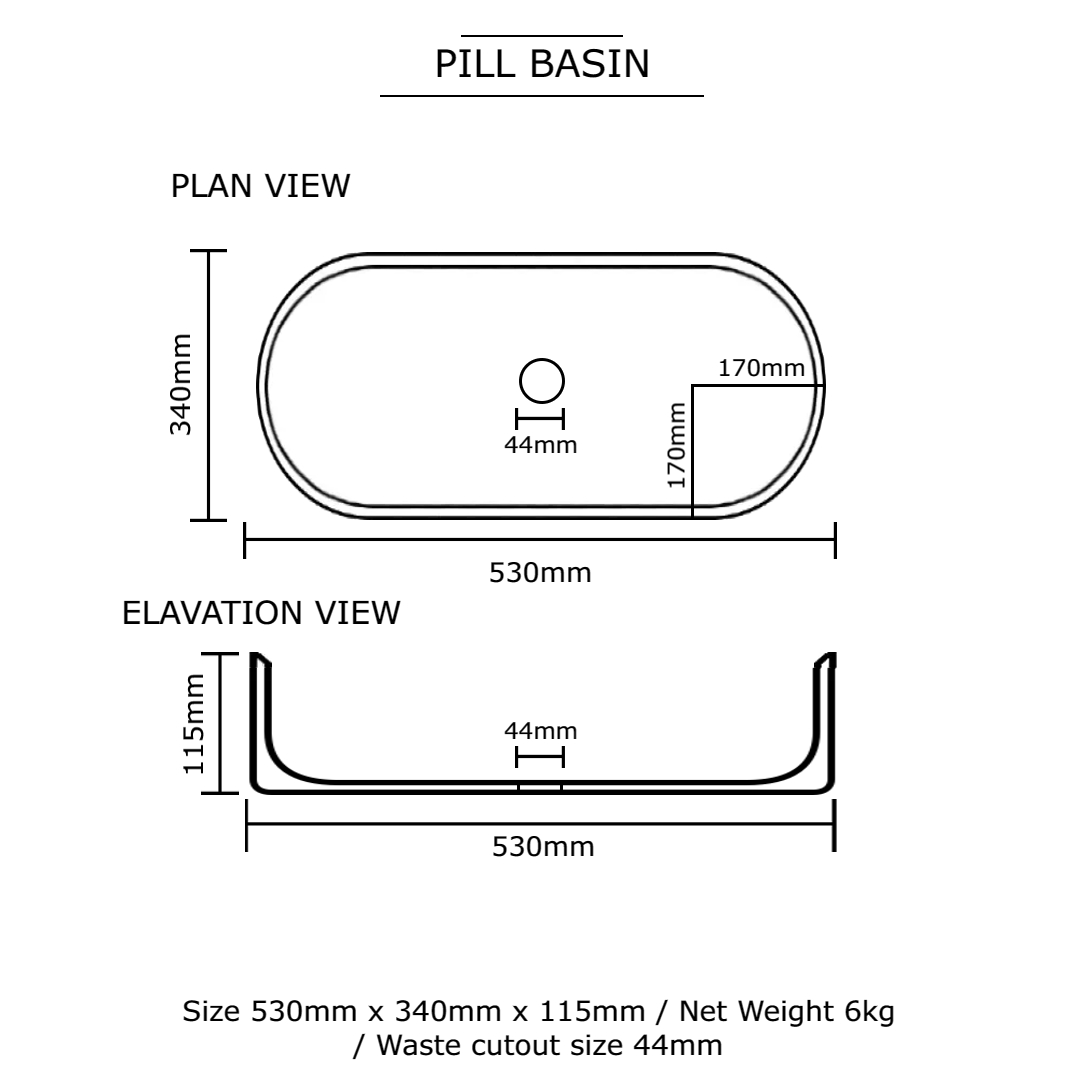
Pill Shape

Coliseum Series
Plaza Series
Stadium Series
Pill Series